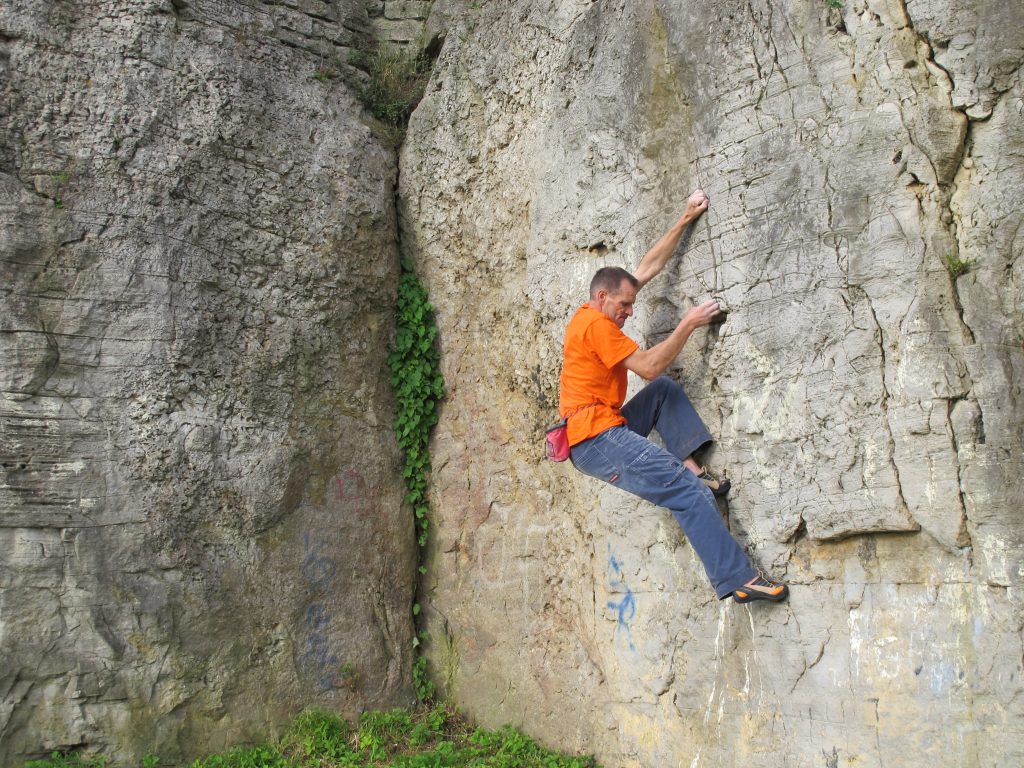
Mike Blenkinsop was the first to record his activities here back in 1974, including Left and Right Walls. Paul Stewart climbed Thin White Crack, The Dancer and the testing Naybrew. Paul Stewart was also involved in the development of the Black Wall with many problems including Improviserand The Rat. Many local climbers have used this compact venue for mid week training but few have “claimed” their achievements as first ascents.
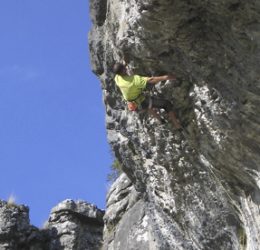
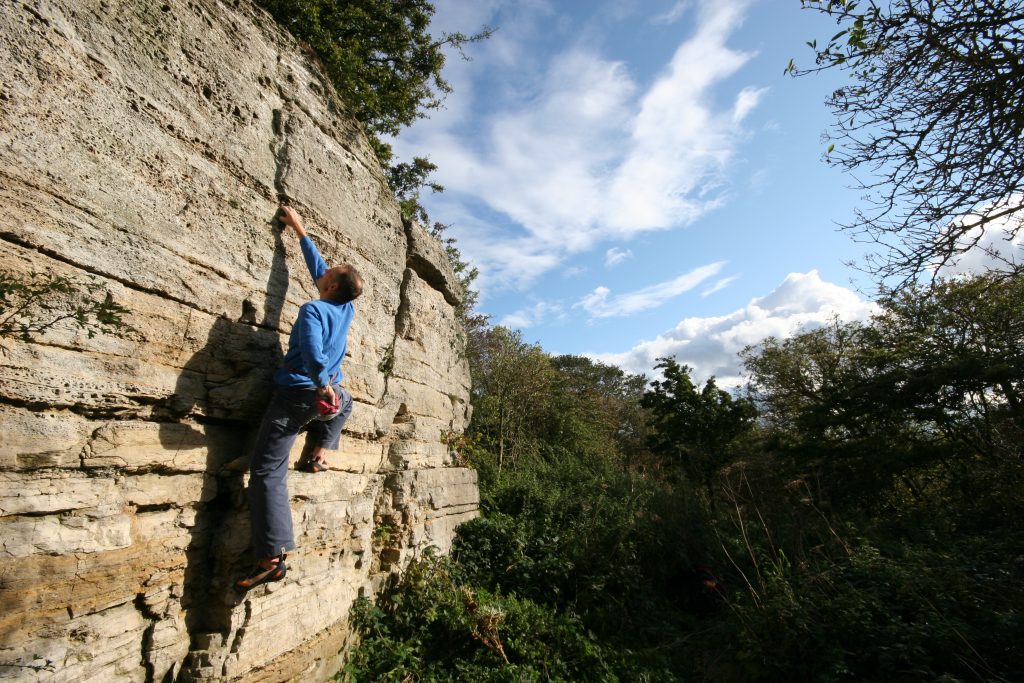
Thin White Crack Font 6A
Situation and Character
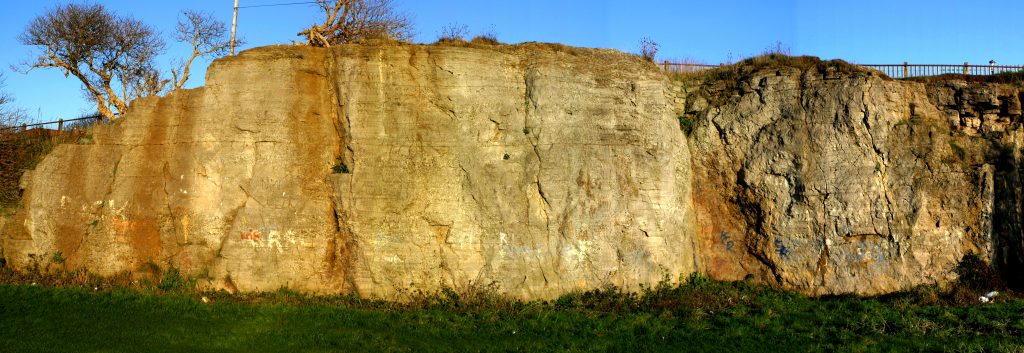
These pleasant, though small, crags are more akin to outdoor climbing walls than some of the major bouldering crags in this guide. The urban setting and southwestern aspect ensures popularity amongst local climbers however a long journey from far outside of South Tyneside can hardly be justified. The rock is Magnesium Limestone with many shell fossils clear to see. The quality of the rock is variable but all the problems described are on good quality limestone, however the more popular problems do suffer from a high polish. Quarry Crag is sheltered and can be climbed on all year round. The nearby Cleadon Crag (NZ392628) has a dozen short solos but unfortunately it is showning signs of neglect and has become more overgrown in recent years.
Quarry Crag is easily located as it overlooks the football fields adjacent to Quarry Lane in South Shields, on the edge of the Cleadon Hills. Park near the junction of Quarry Lane and Larch Avenue.
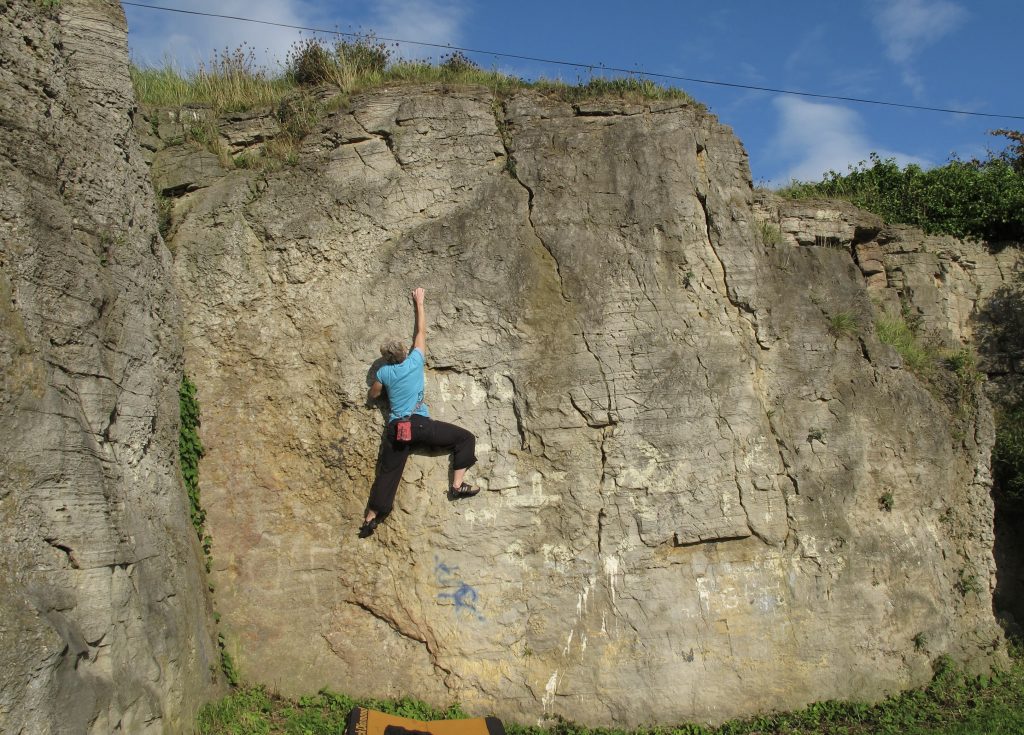
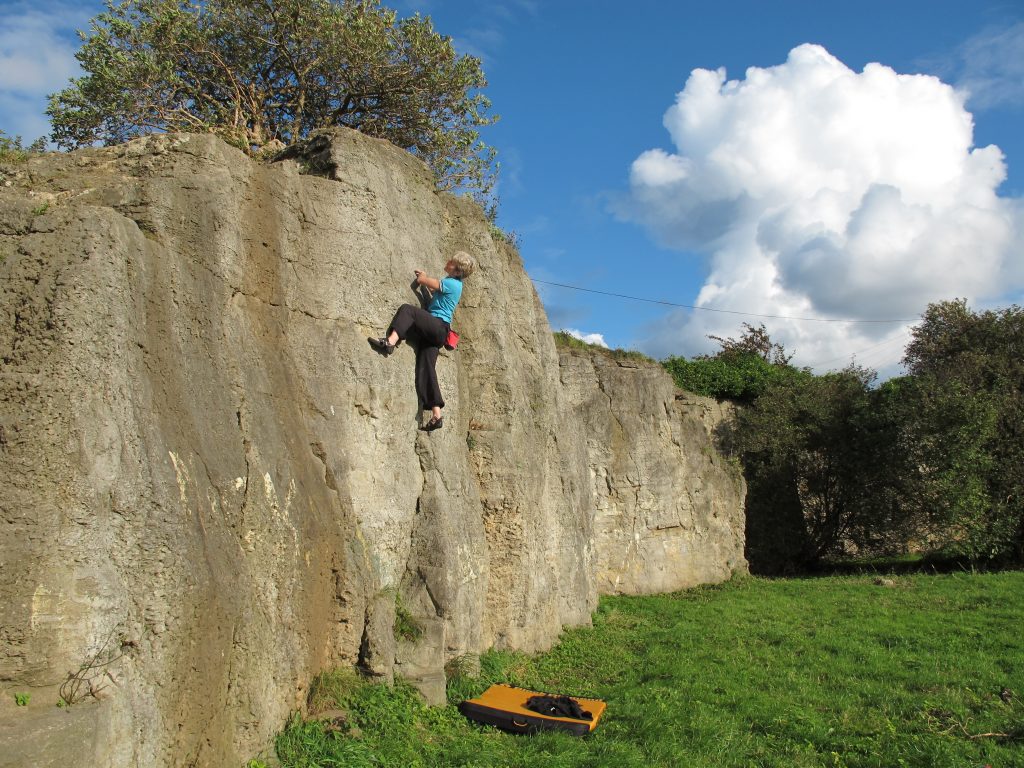
By far the best and most pleasant of the crags in the Cleadon Massif! The problems are short and generally polished. Many of the harder problems are eliminate in nature and obviously many more variations exist than are described here. Despite this Quarry Crag is a popular training area. There are two main buttresses, White Buttress and Black Wall. White Buttress is mostly used for up and down problems while Black Wall is most popular for its pumpy traverses. All the problems are about four metres high. While most climbers boulder here, there is a convenient fence along the top of the crag should a belay be required, however care should be taken not to let the rope run over the edge where irreparable damage has been caused to the soil, especially above White Wall. The climbs are described from left to right.
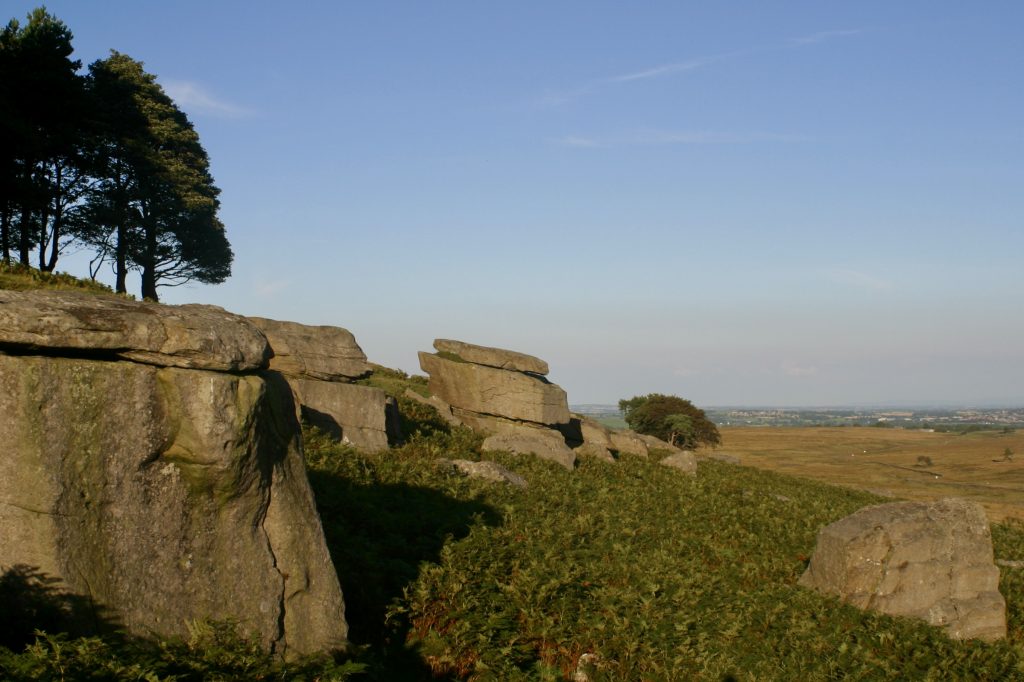
These friendly south facing gritstone boulders at Sunnybrow deserve to be more popular. They are situated across the moor from Goldsborough and about 30 minutes flat walk from the nearest road.
These descriptions confer no right of access but no difficulties have been experienced during the current development.Both the approaches and the boulders lie within the Danger Area of the Battle Hill Firing Range. Do not enter when red flags are flying.
The present level of development results from visit by Alan Dougherty, Kevin Flint and Paul Johnson during summer 2002. Dougherty and Flint had previously visited circa 2000, when several problems were recorded and no evidence of previous climbing was noted. Scope remains for further problems and several existing ones have only been top – roped so far. Steve Crowe visited in September 2002 and added a few problems and freed one previously top roped line.
Character
A south facing collection of Gritstone boulders and buttresses, up to 5m high, spread along some 600m of moor side. The Grit is generally of good quality but care needs to be taken with lichen (brushing has been kept to a minimum) and with the odd friable hold along iron rich bands. Many of the landings are good but there are some real ankle crunchers so beware – a bouldering mat is advised. Bracken between the boulders can be irksome but the bases of most problems are clear. Midges can be a nuisance when the wind drops. Generally the bouldering is of good quality and the ambience and outlook excellent, especially as an evening venue. Many of the problems finish with rounded mantelshelves that can feel precarious if the top is lichenous.
Sunnybrow
Approach
Taking the minor road from Cotherstone to Bowes room should be found to park a couple of cars tidily on the north side of North Gill Bridge (GR 996175). Immediately to the south of the bridge a Public Footpath sign points westwards along a well-defined track. This can be followed, passing a gate / style at a sheepfold, for a couple of kilometres to the ruined farmstead at East Loups’. Just beyond East Loups’, the tumbled down wall on the left (south) can be passed, descending slightly from the ridge track way, and the Easterly Group should be visible just ahead. This approach is 2.3km and takes about half an hour. It should be noted that the boulders are not visible until one is quite close. It is also possible to approach from Goldsborough (from where the boulders are hidden from view) by aiming for the gate (GR 964175) where the previously mentioned track (now marked on maps as a Public Bridleway) meets the open moor, near a solitary pine tree.
Monk’s Moor and Low Carrs are short gritstone edges and blocks situated in the Hupeshope Valley above Middleton in Teasdale.
Monk’s Moor
Situation and Character
This venue is a collection of boulders and small edges standing at the top of Monk’s Moor, an area of moorland situated north-east of Middleton-in-Teesdale. It is well suited to bouldering. The rock is good quality Gritstone but may still be a little lichenous. The problems have been graded as of their current state. Landings are variable in quality and, generally, a mat would be sensible. The outlook, which encompasses the High Pennines, is superb and, given the westerly aspect, Monk’s Moor should provide a pleasing afternoon and evening venue. So far the obvious lines have given easier or mid-grade problems but the potential for harder variations (especially traverses) suggests some interest for those seeking greater technicality. A visit can easily be combined with the generally more serious and difficult bouldering which can be enjoyed at the nearby Low Carrs (NGR: 948303). A walk across the moor of about thirty minutes duration connects the two sites.
History
Long before climbers explored Hudeshope the valley it was exploited for its minerals and there is an interpretative display and self-guided trail based around Coldberry Mineshop . The most prosperous period of lead mining spanned almost the whole of the nineteenth century, creating one of the largest mine complexes of the North Pennines. This industry transformed forever the landscape of Hudeshope Valley. Scattered around the valley are numerous mine entrances and associated buildings that suggest the extent of the intricate system of shafts and levels that exist below the surface. On the valley sides are reservoirs and the remnants of a man-made water system that was used to power the mine machinery. Coldberry Gutter, the largest hush in the North Pennines, cuts through Hardberry Hill to form a distinctive scar on the horizon that can be seen from miles around.
Alan Dougherty and Kevin Flint visited in late July 2005, when the first twenty-five problems were ascended and recorded. Three subsequent visits, during August of that year, by Carol and Alan Dougherty, resulted in the discovery of a further thirty-four problems.
Access and Approaches
Monk’s Moor is now designated Access Land under the Countryside and Rights of Way Act 2000. Under that Act dogs are excluded currently and the land can be subject to temporary closures of up to twenty- eight days a year. These are likely to be applied for during the Grouse nesting season. Notification of closures should be posted at Access Points locally and, prior to a visit, can be checked on www. countrysideaccess.gov.uk or via the Access Helpline on 0845 100 3298.
The area is covered by several conservation designations. Prior to development our intentions were run past English Nature. Their main concern was the possible disturbance of ground nesting and other birds.
Approach takes a comfortable thirty minutes. From Middleton–in-Teesdale take a minor road northwards up the east side of, the initially wooded and then mine-ravaged, valley of Hudes Hope. The road leaves Middleton-in-Teesdale from opposite the fish and chip shop and is sign-posted Stanhope. After 300m avoid the right turn to Stanhope and continue straight on – sign-posted Snaisgill. Some three kilometres along the road from Middleton –in Teesdale a gate is reached, just before a sharp left bend. Prior to this gate it is possible to park a car carefully on an area of wider verge. A nearby gate gives access to a field east of the road. Walk upslope (roughly east) to a second gate from which an approximately easterly walk of 600m should deposit you at the boulders. By following a line from the second gate towards the left end of the outcrop gives easier going that avoids the deeper heather.
General Layout
Prominent near the centre of the edge is a multi-penned, partly derelict, dry-stone walled Sheepfold that has been built against the SHEEPFOLD BUTTRESSES. The left extremity of the boulders lies some twenty metres north of Monk’s Currick, a round cairn come shelter on the moor above the edge. The furthest right of the boulders THE SHOOTING BOX GROUP lies close to the, also semi-derelict, hut – the Shooting House. All of these three features are marked on the 1:25000 OS map.
Low Carrs is a compact location comprising principally of several walls of excellent quality Gritstone up to five metres high. It stands on the southern edge of Middleton Common overlooking the valley of the Hudeshope Beck, both of which lie just to the north of Middleton-in-Teesdale. The outlook is magnificent and the site quiet. A visit can easily be combined with the generally less serious or difficult bouldering at the nearby Monk’s Moor Boulders (NGR 962289). A walk across the moor of about thirty minutes duration connects the two sites. Landings vary from the good to the potentially back-breaking / body-impaling and, given that the lack of traffic so far means some of the rock is lichenous and gritty, a circumspect approach is advised towards some of the problems. Some of the more serious problems have been top-roped and await better conditions for the intended solo. Burly spotters and a selection of mats would be useful. Nevertheless Low Carrs holds some excellent quality wall and arête problems.
History
Carol and Alan Dougherty together with Kevin Flint visited in August 2005, when the first twelve problems were ascended and recorded. The Doughertys added a further seventeen problems during two further visits later in the month.
Access and Approaches
Low Carrs lies on moorland that is designated Access Land under the Countryside and Rights of Way Act 2000. Under that Act dogs are excluded currently and the land can be subject to temporary closures of up to twenty-eight days a year. These are likely to be applied for during the Grouse nesting season. Notification of closures should be posted at Access Points locally and, prior to a visit, can be checked on www.countrysideaccess.gov.uk or via the Access Helpline on 0845 100 3298.
From Middleton-in-Teesdale take a minor road northwards up the east side of, the initially wooded and then mine-ravaged, valley of Hudes Hope. The road leaves Middleton-in-Teesdale from opposite the fish and chip shop and is sign-posted Stanhope. After 300m avoid the right turn to Stanhope and continue straight on – sign-posted Snaisgill. Some three kilometres along the road from Middleton-in-Teesdale a gate is reached, just before a sharp left bend. Amongst other possibilities, it is possible to park a car carefully on an area of wider verge on the right seventy metres prior to this gate.
Walk through the gate and take the track (not the sign-posted footpath) which starts behind a metal vehicle barrier and runs northwards from the sharp bend in the road. The track zig-zags upwards through a large spoil heap to reach some ruined mine buildings. At this point take the left-hand fork and continue through three wooden gates. Just after passing the third gate take a sheep trod on the left, which follows the line of the dry-stone wall across the moor. Low Carrs is reached in about 500m from this last gate, having passed some smaller boulders, one of which might give a bum-scrapping traverse.
General Layout
On arrival the most obvious feature is that of the arête. To its left lies the main wall, whilst further left are the Left and Right Short Walls. To the right of the arête are the dry-stone wall remains of a ruined “hut,” which enclose the side of the hut wall and part of the back of the hut three tier wall. Further to the right is the Elephants Forehead, whilst other problems lie on The Scrappy Buttress just to the right of this feature and on The Isolated Block diagonally right, further up the slope behind. The problems are described from left to right as facing the crag.
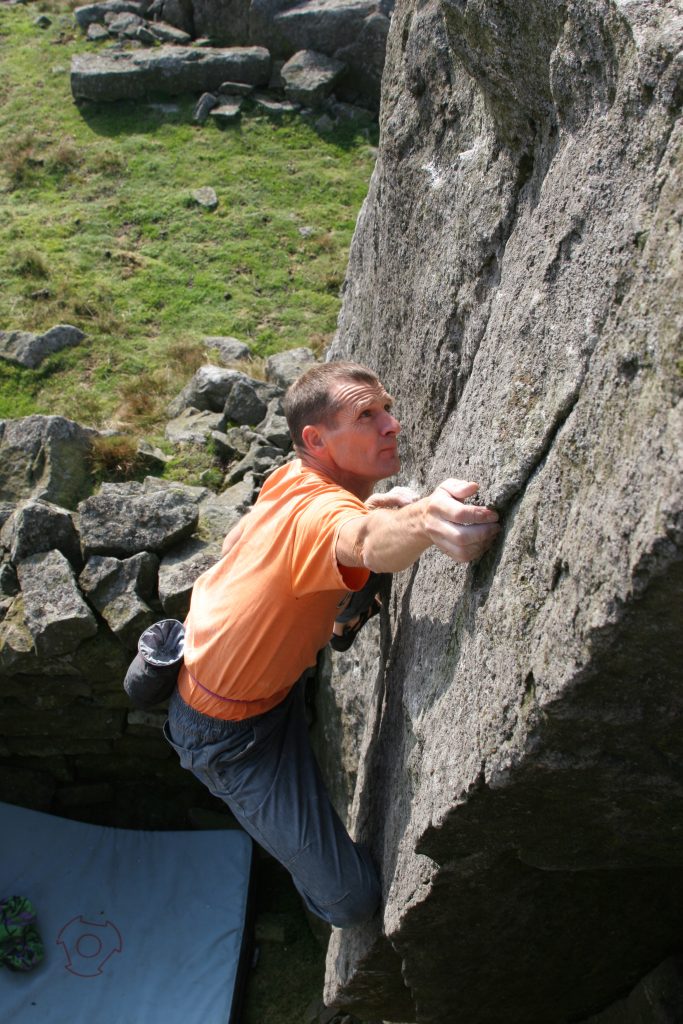
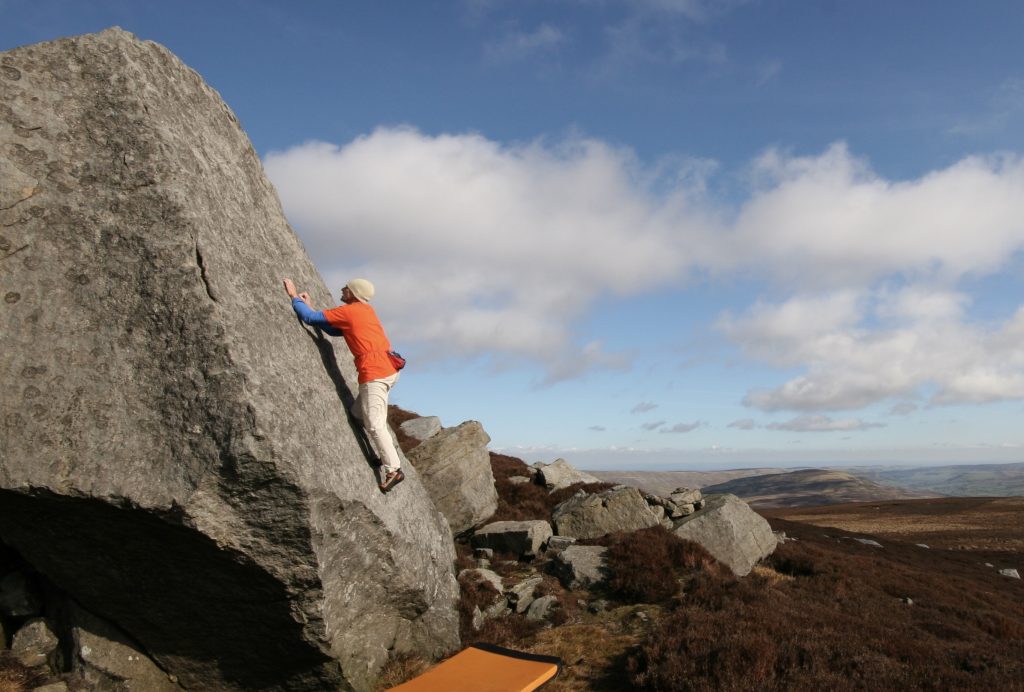
Situation and Character Perhaps the most remote of all the venues covered in the guide but well worth a visit, this collection of small buttresses and large boulders is situated in a quiet part of the East Pennines at an altitude of over 500 metres. The rock is excellent quality gritstone which has a classic rounded nature and many blind cracks. This gives rise to “smear” problems on both delicate slabs and steep walls. The situation is a suntrap in good weather and a superb quiet setting. A good place to get away from the crowds! It is comfortable to climb here from late spring to early autumn. From a bouldering/soloing viewpoint the landings are not always good, so plenty of pads and spotters could make the day more pleasant. That said and although most of the routes here have been soloed the use of a rope can sometimes be prudent on the bigger climbs.
History Dave Staton whose routes during trips with the Youth Clubs of Darlington included those on Miners Wall and Calver Face was the first record his activities in the early 1960’s. Bruce Perry added routes to the West side of Luckystrike Buttress. Whilst checking out the crag for the North of England Guide, Ron Kenyon climbed a number of routes in 1978. In more recent times, Karl Lunt has climbed many of the existing routes and added some of his own the best of these being On The Level and Karl’s Arête. FRCC stalwart Ron Kenyon is Mr Wobbly. Alan Dougherty continued the development during the 1990’s with his highlight being the The Emerald Isle, which was named by Steve Crowe thinking he was making the first ascent later in the same decade. Bob Bennett, Mark Turner, Steve Crowe and Karin Magog added many more routes and problems during the 1990’s. Of particular note were the ascents of Their Glorious Wealth the first route to tackle the awesomely steep west wall of the Inclined Buttress, the impressive lead of Blood Red Streets and the highball solo ascent of the classic Sin Feinn. Ian Cummings made an impressive onsight solo repeat of Blood Red Streets above a six foot covering of snow.
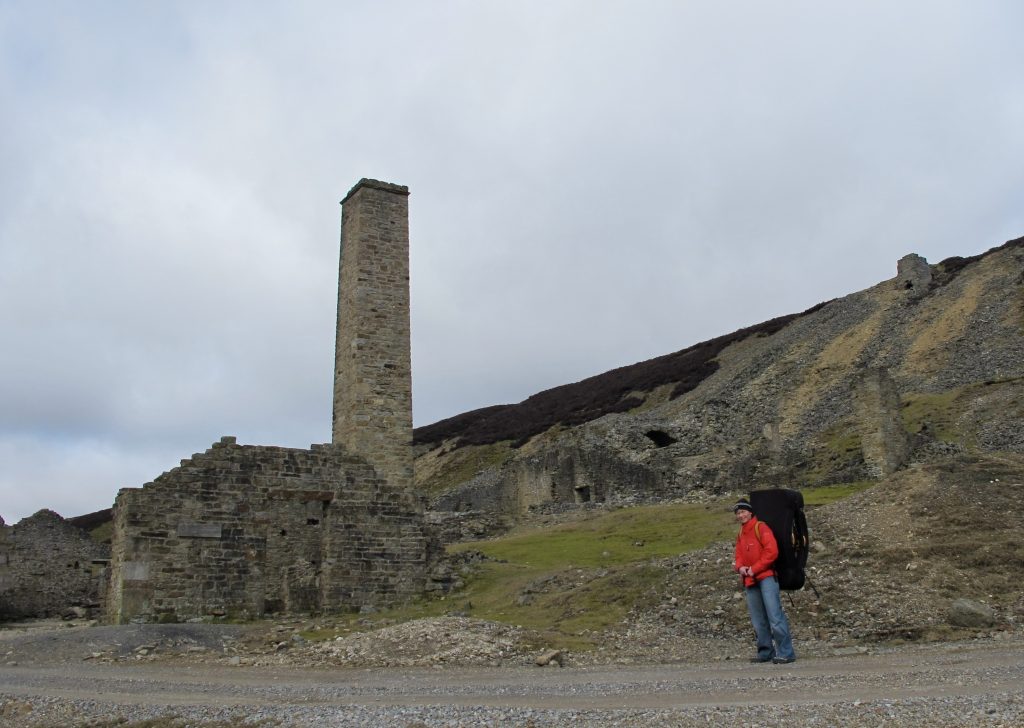
The best approach is by the old flue running up from the Old Gang Smelt Mills. Park at the popular picnic spot where Surrender Bridge crosses Hard Level Gill. A good level track leads west from here above the north side of the river to reach the old mining ruins at NGR 974005. At this point the ruins of an old flue (looking like an old dry stone wall from a distance) runs directly up the hillside northwards over a number of false summits! The crag is not visible until just before the top of the hill. The flue squeezes between The Lumberjack Wall of the Third Flue Buttress on the left, and The Magic Buttress on the right. The approach as described, although not the shortest, is the estates preferred route and anyway may save time spent stumbling aimlessly across the heather clad moors.
The smooth Skiver 4+ smears up the centre of the slab.
Goldsborough is a superb remote Pennine gritstone outcrop a few miles from Barnard Castle. The rock is of good quality in a pleasant situation overlooking Hury and Blackton reservoirs in the shallow valley of Baldersdale. The crag has a scattering of boulders and short walls on the North face and much bigger series of South facing buttresses all wrapped around a small, rising, moor land summit. Although exposed to any wind, it is quick drying, as it does not suffer from any drainage or seepage. The crag does enjoy visits all year round but it is more comfortable from early spring to late autumn. A pad may prove more useful than ropes at this crag as soloing appears to be the norm however many of the routes do offer placements for protection and there are belay stakes at the top.
History
There are no records of the early development of Goldsborough. It is known that Bentley Beetham climbed here regularly during the 1930s, bringing parties of pupils from his Barnard Castle School. The adventures of the Goldsborough Club, as they were known, are recorded in the Fell and Rock guides to the Lake District. Most of the easier routes were recorded by members of the Eden Valley MC during the late 1970s during work on the first edition of the “North of England Rock Climbing Guide”.
Climbers from Barnard Castle were also active, in particular Paul Carling and Nigs Reader. Motivation was climbed by Reader in 1980, while Carling recorded many testing problems including Enigma, The Thornbird and Long Reach all prior to 1982. Ian Cummins added the bold GreenNigel in 1983 and Nick Clement climbed TheObsessed and Viola.
During the mid 1980s Ian Cummins climbed the FootlessTraverse on Thin Wall Buttress. Stu Ferguson climbed Flymantle on the North Facing section; Steve Crowe added the more serious variation. Bob Bennett, Steve Crowe and Mark Turner added many new problems while working on the first edition of Climbing in North East England.
Bob Bennett began developing the North East Boulders during 1995 with about 15 problems added by spring 1996. Steve Crowe recorded a number of traverses during the winter of 1995/96 including Askew and UpperBreak, although it is possible they were climbed before. Due to bad fingers/work/kids/staleness etc., Ian Cummins had kept a low profile for 5-6 years before surfacing in 1997 to report the hardest problems at Goldsborough to date. Beth’sTraverse from July 1996 and George’s Roof climbed in July 1997 both have become classics.
Andrew Earl traversed the SuperLowLevel on the Thin Wall Buttress in January 1997 and Steve Dunning extended this in 2001. Dunning added three desperate combinations, Something Burning, Second Coming and Juxtapose around this time. In April 2002 Ian Cummins made the long overdue ascent of HolsteinFriesian. Tom Newman has added a fews powerful problems more recently; Mr Motivator 7C, Upside Downtown F7C, Clamp Faster 8A, Plump Master 7C and This One’s For Cummings F7C. Dan Varian left his mark in 2019 with some impressive link ups the best are probably Polo and Clamp Faster both 8A
Bentley’s Buttress
Bentley’s Buttress
The crag is clearly seen above the road. This is North West Buttress which is a little underwhelming and just to the left is the compact wall of Bentley’s Buttress which has half a dozen worthwhile climbs that may need brushing and are best enjoyed on a warm mid summers evening. The spectacular Flymantle VS 5a tackles the centre of the roof to the left of the photo above. However most folks head straight over the top to the sunny side.
Enigma Buttress
The Swaledale Morris Men is an ungradable one move wonder that is sometimes the first warm up. Both Old Moss 5+ and Enigma 6A+ are much sought after ticks but ascents are hard fought for. Being West facing the Enigma buttress may be a bit chilly and better saved for a warm down.
Hubris Buttress
The classic climb here Hubris 6A+ fell down. Ian’s Arête is certainly a sandbag at 7A.
Further right Yoke Buttress isn’t especially impressive but it contains a bunch of reasonably easy climbs that are great for warming up on.
Thornbird Buttress
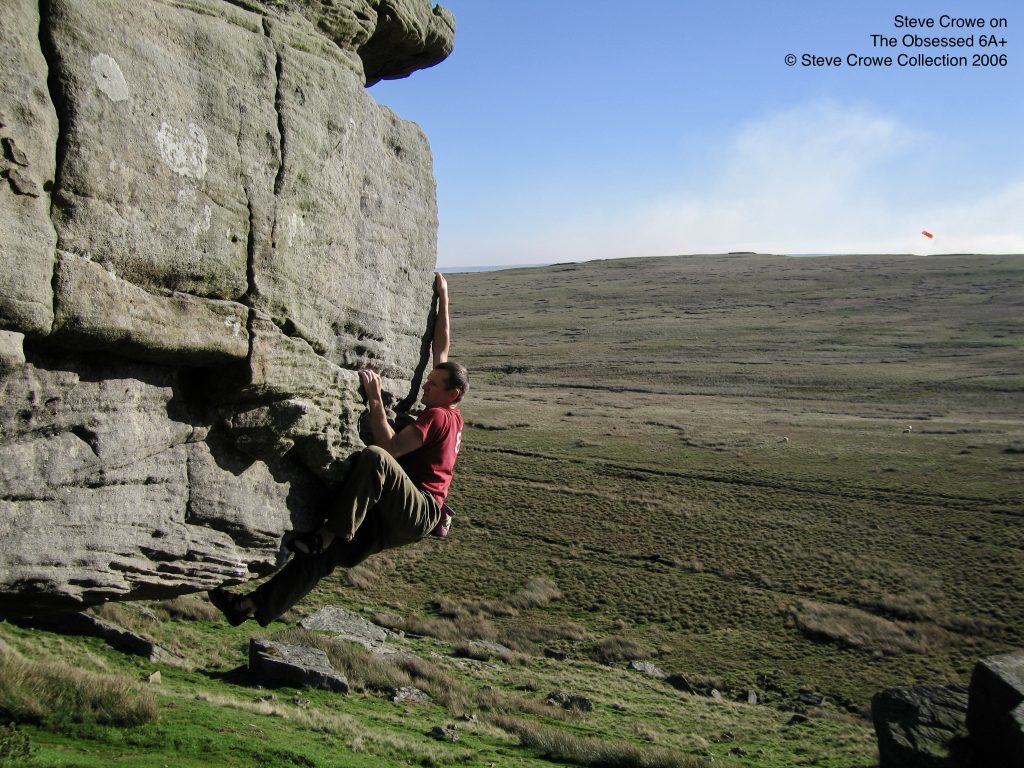
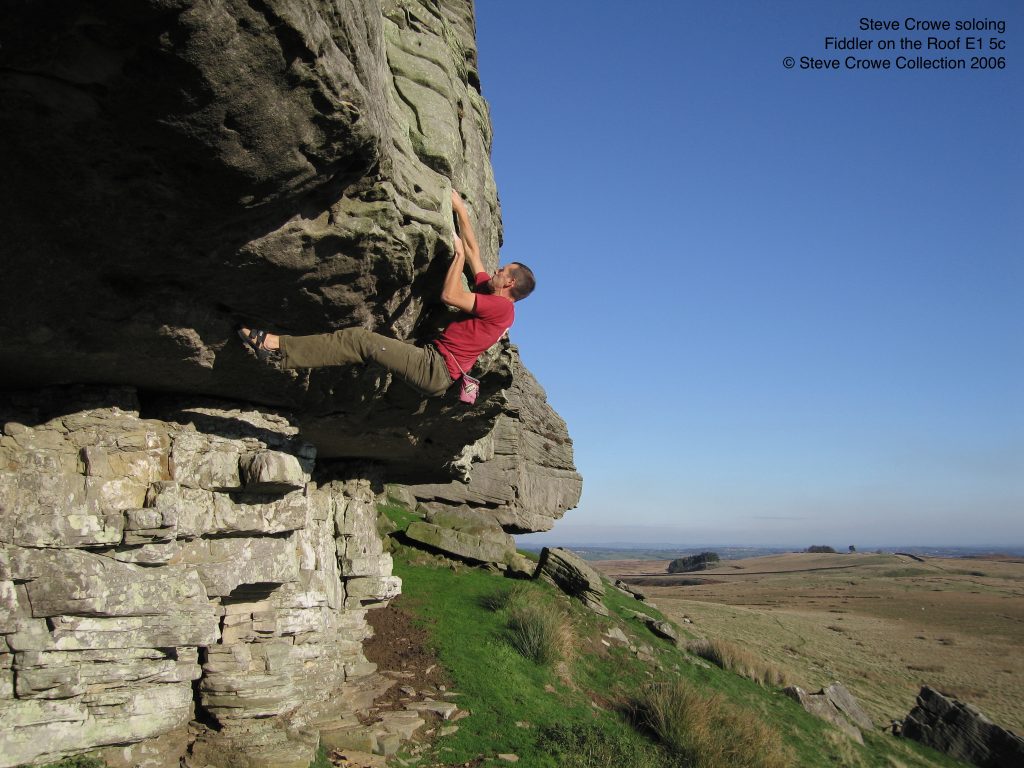
This is the left-hand of the two main impressive buttresses. George’s Roof 7B+ is essentially a direct start to the left arête which is Nick Clement’s The Obsessed 6A+. Fiddler on the Roof E1 5c is much sought after. A powerful start across the huge roof leads to an easier finish. The Thornbird and Green Nigel share the same powerful start and grade E2 6a. Be sure they are clean because they are all quite bold. Dan Varian’s Clamp Faster 8A is a more recent addition.
This is the main buttress for the strongest boulders with lots of powerful problems climbing out across the steep roof however there’s plenty for mere mortals to try. The hanging left arete, Fiddler’s Arete HVS 5b, is the most popular climb at Goldsborough. The start is the hardest but the finish feels high and is well protected if you have dragged a rope behind you. Fiddler HVS 5a starts to the right of the arête then eventually joins the arete high up, a direct finish is a tricky E1 5b. The steep right arête is climbed by Jumping Jack Flash 6A+, if you’re successful on this be sure you have someone ready to take a picture. If you found that too easy then try starting on Beth’s Traverse 7C. This crimpy test piece is much sought after but requires impressive finger strength.
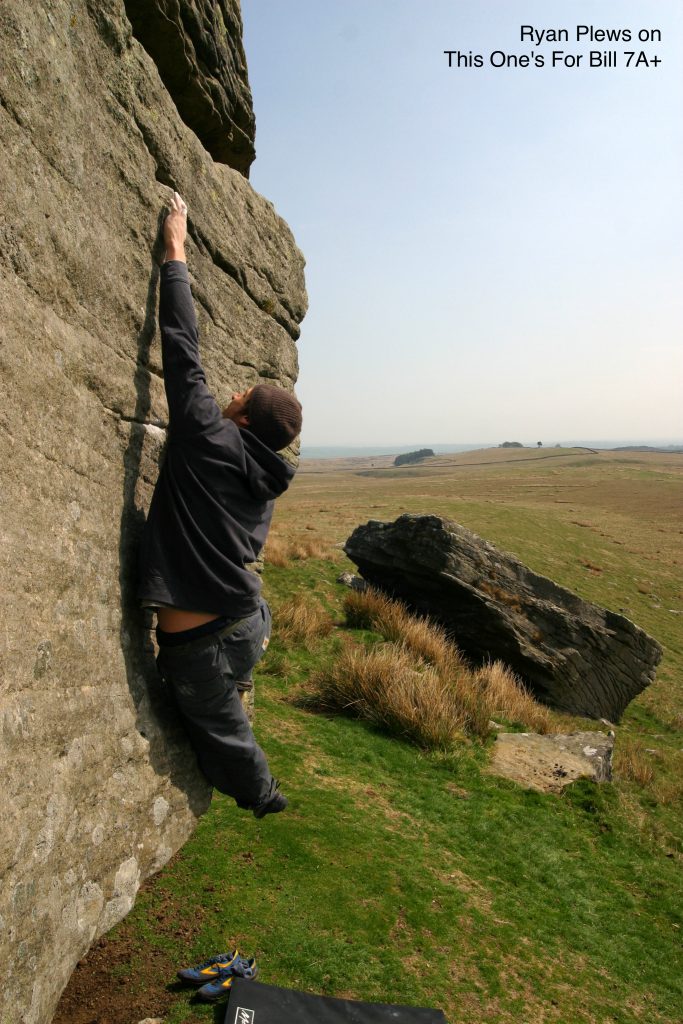
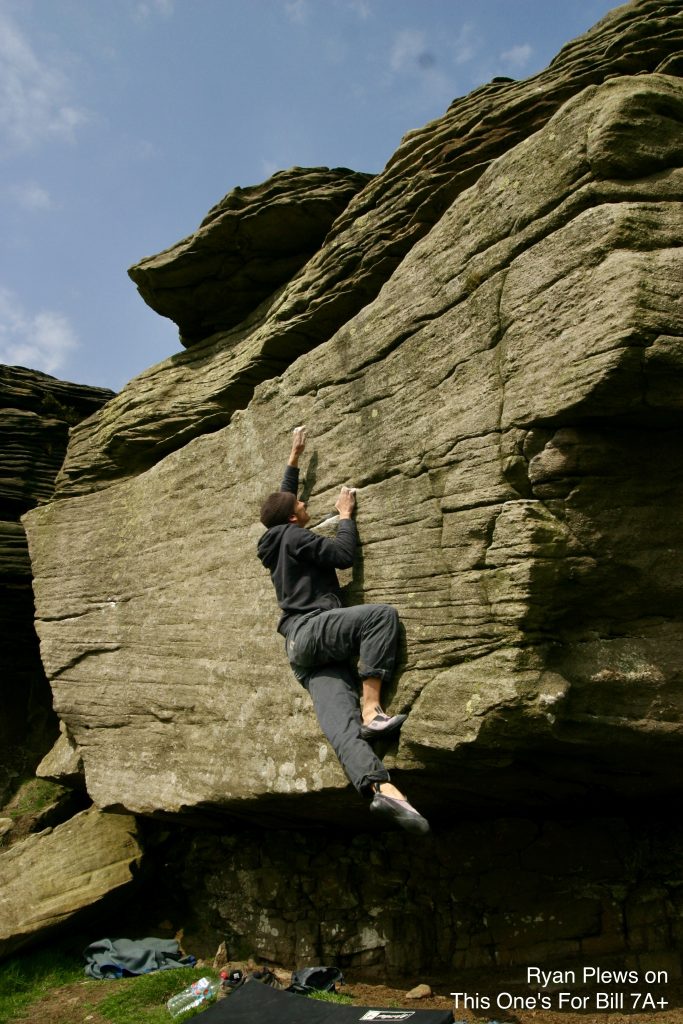
The final south facing wall, Baldersdale Buttress is a pleasant buttress with some shorter problems. The tricky Plagiarist and Plagiarist Left-hand both get 6A, This One’s for Bill 7A+ climbs the centre of the wall on poor crimps. The arete is climbed by Bass Special Font 4+, it’s easier than it looks but no giveaway.
Ryan Plews on This One’s For Bill 7A+Ryan Plews on This One’s For Bill 7A+
South East Boulder.
There’s a clutch of testing short problems and some tricky traverses on the South East Boulder including the popular The Tide is Turning 6C which is harder than it first looks.
The climbing on the north face is on smaller and less frequented boulders and short walls. These climbs are best enjoyed on a mid summer evening but take a brush as they are a bit neglected unfortunately.
Karin and I first became aware of the rock climbing developments in Caithness in 2003 when Jo George reported Sarclet Pimpernel and Groove Armada by Trevor Wood, Guy Robertson and Dave Porter on the brilliant Scotland Online website. We always planned to go sometime to check it out but we never quite managed to drag ourselves away from the awesomeness of the West Highlands. It wasn’t until Guy Robertson published his fantastic book The Great Sea Cliffs of Scotland in 2020 that we finally put our plans into action.
Sarclet Pimpernel E1
We both love climbing on sea cliffs and three Caithness cliffs were described in Guy’s coffee table book; Sgaps by Murdoch Jamieson, Ellen’s Geo by Simon Nadin and Sarclet by Rob Christie. The fantastic photography was a great help for getting a feeling for the place before we’d even left home. Sea cliffs are notorious for finding the right place to abseil in but we soon found ourselves at Sarclet and tied our ropes to the three abseil stakes.
Groove Armada HVS
Sarclet
We warmed up on the awesome HVS Groove Armada then Karin lead the spectacular E1 Sarclet Pimpernel. While belaying we were both drawn to the well chalked lines of Northern Alliance and Djapana two fantastic looking E3’s. By the time we climbed those we could clearly see the lines of Orchid Hunter, Time Bandit, and The Harr Bringer. We were already hooked!
The Orchid Hunter E3 5cThe Orchid Hunter E3 5c
It was the last day of good weather on another trip before we got to try those three routes. We decided on an early start to make the most of the morning sun and I was soon enjoying perfect conditions on the sheltered The Orchid Hunter E3, however as Karin topped out the wind picked up and heavy rain started. Disappointed we retreated to the cafe where we checked the ongoing forecast again, it was dire, but the sun was back out so we suddenly decided to take the chance and walked back in with fresh determination. Karin made quick work of the steep and impressive Haar Bringer E4, tricky route finding weaving between the overlaps, I was relived to second this one. I preferred the look of Time Bandit E4, which I thought was very good, bolder than I anticipated and certainly no push over.
Karin leading The Haar Bringer E4 5cKarin leading The Haar Bringer E4 5c
Around the corner on the North East face we climbed Walking on Water E2. It is an excellent steep climb mostly on good holds however the crux was unexpectedly greasy and proved to be more of a challenge than anticipated. Early morning sun and wind off the land would probably provide better conditions.
Geo of Creagan Righe (Sgaps)
Karin abseiling into Geo of Creagan Righe (aka Sgaps)
Sgaps (Geo of Creagan Righe) is one of the more accessible crags at Caithness with one of the hardest climbs established in the area so far, God’s Gift, a tough looking E7. This impressive geo is littered with strong lines for the fit climbers. While the continuous climbing on Deep Joy E3/4 and Big Sky Country E4/5 makes both memorable experiences, the best of the bunch is undoubtedly the well protected and well pumpy Spummin’ Marvellous E2/3.
Spummin Marvelous E2/3
Ellen’s Geo
Ellen’s Wall is understandably popular as it has a terrific collection of routes mostly between E1 to E4. It’s difficult to select a highlight because everything we’ve climbed there has been a bit special.
Ellen’s Wall
The first route we climbed on Ellen’s Wall was the brilliant Hundreds and Thousands E2 5c. One of the best is certainly Strata Gem E3 5c but we say that after every route we’ve climbed on that wall. Non Stop Nitty Gritty is another memorable E3 5c in a spectacular situation and the brilliant Fracture Clinic E4 5c is already a classic.
Karin leading Hundreds and Thousands E2 5cStrata Gem E3, Ellen’s Wall
We frequently have spectators on board the Caithness Seacoast tours shouting encouragement too! Karin is in the exposed hanging groove of Toad in the Shoe E2 5b.
Ellen’s Wall from the Caithness Seacoast tour boat.
Latheronwheel
The popular Latheronwheel is the first venue encountered when you arrive at Caithness. It has a pleasant 10 minute approach from the harbour and a good selection of enjoyable sub extreme climbs.
LatheronwheelLatheronwheel
Stepping Out and Pistachio are two sought out Severes. Puffin Attack VS is a fun face climb and if you’re looking for something a little harder Guillemot Crack and Positive Mental Attitude are a pair of popular HVS’s. High tides or big seas can restrict what you can climb but the routes around Fall Out HVS at Latheronwheel has saved a few showery days for us due to its easy access.
Karin leading Fallout HVS at LatheronwheelAlan following Rob up the short and sharp Fallout HVS at Latheronwheel
Skerry Mor, Mid Clyth
Skerry Mor, Mid Clyth
We’ve climbed a lot at the friendly Skerry Mòr, Mid Clyth. The wall has strong crack and groove lines providing many of the easier lines with good protection and great character. Karin and I had gone for the harder face climbs but couldn’t avoid the draw of Sprockletop VS and Maelstrom HVS. Finally, Silverfish E1 is a superb route with a hard start. Great warm down, but certainly not recommend as a warmup!
Silver Fish Area, Skerry Mor, Mid Clyth
At the other extreme we both led the fantastic but bold Impending Doom E5, after a close inspection on abseil assured us that there was adequate protection where you need it. I was pleased that Karin led The Annunciation E3/4. Originally given E2, E4 in the new guide may be too generous. Perhaps E3 but the crucial cam is small, Karin had to drop a loop to pull up the appropriate size micro cam while hanging on in an awkward position! The adjacent route had birds nesting near the top but we liked the look of it so we returned later in the year and Karin led The King’s Pyjamas.
Karin on The Annunciation E2/4Karin leading The Kings Pyjamas E2
Some routes here are just so good and it’s a friendly venue where it is easy to abseil back down to strip especially handy when there’s a strong westerly making belaying at the bottom of the crag more pleasant than sat on the top. Using this approach we both led the classic Incubus E3, The Fearful Void E4, Hammer House E4 5c and our own new route, the bold Signed, Sealed, Delivered E3 5b.
Inset Wall, Skerry Mor, Mid Clyth
We enjoyed the climbing on Inset Wall so much that we climbed all the routes between the steep and sustained Frog Stroker HVS and excellent pumpy Mug’s Game HVS. Susan and Amateur Operatics are interesting E3’s Theatre of Cruelty solid E2 and Stage Fright E2 proved quite tricky in the groove.
Karin leading Amateur Operatics E3 5c
Beyond Hammer House is South Bay where we have our eyes on the bold Love is Suicide E3 5b and the even bolder Friends in High Places E4 5b. Sandwiched in between is a bunch of more reasonably graded routes including the popular Oxter, Severe.
South Head of Wick
Karin leading Wick and Feeble E2 5b
South Head of Wick has a few very accessible quick drying routes from E2 to E4 on excellent hard sandstone. The Lightness of Being E3, Selkie E2 and Wick & Feeble E2 lay just south of the fisherman’s steps and are all worthwhile. Despite being only 10 metres long they are all surprisingly pumpy. Nearby is the popular tourist attraction of The Castle of Old Wick and adjacent to it is the Stack of Old Wick which is a popular training route for climbers heading to Orkney and The Old Man of Hoy.
Guidebooks
There has been a lot of development since the definitive guide to Caithness was published by the Scottish Mountaineering Club in 2004. The best guidebook is the selective Scottish Rock (SMC/Wired) which covers Sarclet, Ellen’s Geo, Skerry Mor (Mid Clyth), Geo of Reagan Right Clyth(Sgaps) and Latheronwheel. Gary Latter published the 3rd edition of his popular Scottish Rock Volume 2: North in 2020 and it covers Latheronwheel, Sarclet and Stack of Old Wick. If current guidebooks leave you wanting more the SMC have now made their entire routes database public here.
Scottish Rock Climbs (SMC Wired)
Compiled by Kevin HowettScottish Rock Volume 2: North
Gary Latter. (3rd Edition 2020)
Further Reading
“The Great Sea Cliffs of Scotland by Guy Robertson is the 2021 Banff Mountain Book Award-winning anthology of outrageous climbing adventures from 26 of the most extraordinary sea cliffs across Scotland.” including three on the east coast of Caithness.
The Great Sea Cliffs of Scotland by Guy Robertson in 2020
Tick List
Karin and I still have lots we’d like to do. Classics like Silver Surfer HVS at Sarclet, Brains as well as Braun E4 at Ellen’s Geo and Cauliflower in the Soup E5 at Sgaps. There’s so many Caithness Classics that I’ve added a list on UK Climbing. We have only just scratched the surface. Every trip we’ve made, we have returned home with an ever increasing to do list. Hidden Wall and Clythness North is high on the list and if the training goes well maybe we’ll have a look at God’s Gift.
Rest Day Activities
There’s lots to see and do in and around Caithness but our favourite pastime is to visit the fantastic small harbours along the coast. They all have their unique character and fascinating past. Lybster harbour was a busy fishing port during the boom in the herring fishing and although much quieter these days, it is still perhaps the busiest one we’ve visited. Many of them are tucked away down narrow little roads but are well worth seeking out. The recently renovated Whaligoe Steps, which are adjacent to the parking for Ellen’s Wall, are a very popular tourist destination and well worth a walk down either before or after climbing. The small car park gets rammed though, so an early start is recommended to get parked if you’re heading to the crag. There are also numerous ancient stone tombs/burial sites to visit, plus an archaeological trial near Loch of Yarrows that you can walk round.
The area also has a diverse mix of cafes for those damp days. We particularly like Wickers World next to the harbour in Wick, with its wide range of good quality home cooked food at reasonable prices.
This is the definitive sport climbing guide to La Hermida Gorge by Richie Patterson.
El Desfiladero de La Hermida is the definitive sport climbing guide to La Hermida gorge which straddles the Asturias/Cantabria border in NW Spain. It contains 24 never before published crags and nearly 700 routes, many of which have only recently been developed. The whole gorge from Pechon on the coast, to the alpine meadows of Cabanes, has a fantastic variety of single pitch sport climbing on generally excellent limestone. The routes are graded from very easy, on many accessible roadside slabs, to almost impossible up in the “almost inaccessible” world class cave of Carcalosa. This valley is covered by the second edition of the Roca Verde guide but the El Desfiladero de La Hermida guide has even more sectors included. A generous percentage from sales of the Roca Verde guide have funded some of the more recent development. The secrets of the most sought after crags in the valley, including the world-class venue of Cicera, are now described in detail. Clear photodiagrams are complemented by some excellent action photography. There is certainly something here for everyone at whatever grade you climb. A 70m rope should be considered a minimum but some of the newer hard routes advise a 100m rope as preferable, 20 quick draws will be enough for most of the routes covered in this guide.
The Climbing The crags are all situated on the Eastern flank of the Picos de Europa in or close to La Hermida gorge which straddles the border of Cantabria and Asturias in Northern Spain. The area is less than an hours drive from the airport and ferry terminals at Santander. There are 24 crags described in detail in this definitive guide to the area, many for the first time, the highlights include Rumenes, ElInfierno, Cicera and Carcalosa. One or two of the sectors still have some trad climbs so be sure to read the guide carefully and/or carry a small rack of gear. There are many classic multi pitch mountain routes in the nearby Picos de Europa to enjoy but they are not covered by this guidebook.
The first crag described here is the sea cliff at Pechon with easy access and unique atmosphere for the area. Both sectors are slightly overhanging with a good selection of routes 6a-8a. Belen 6a and Jandro cotizando 6a are popular easier routes then there is loads of choice at 7a-7b but La vieja escuela 7a+ and Kurt Albert 7b are very enjoyable.
Estraguena is a small crag but packed with quality, south-east facing with plenty of afternoon shade. It is almost roadside but not really family friendly due to the awkward approach and the narrow ledge at it’s base. The crag offers a great introduction to tufa climbing in the valley and is generously graded, making it a good starting point. Princesa deva 7a, Marabunta 7a+, Alpinista Egoista 7a+, Granma 7c, Goliath 7c, Imperfectus bultus 7b+ and Austurcantabra 7c+ all standout. Primera intencion 7b is also good but I thought it was hard for the grade.
A short way further up the valley are Rumenes and nearby Elinfierno, they are among the best crags in the gorge with long and steep tufa climbing especially in the 7’s and with some 8a classics. They both get plenty of shade in the afternoon.
Probably the most sought after routes at Rumenes are the outstanding Invocando de Onan 7a and the unrelenting 40m pump festSindrome de Stendhal 8a. However Vinarock 7a+, Rumenes power y albino 7a+, Apokalimnos 7b, Tubular hell 7b+, El dia del arquero 7c and Panico nuclear 7c are all exceptional. Some of the highlights up at Elinfierno include the steep and burly Malas Pulgas 7a, Hellboy 7a+, Cachimente 7b, Balambambu 7c,El algoritmo Wallman 8a and the brilliant 47 ronin 8a.
The next crag of note is the accessible Urdon with a selection of popular routes in the 6’s and 7’s and three good 8a’s. El pajaro momificado is an enjoyable 6b with a harder extension at 7a. Effecto Domino 7band the unnamed 7c to its left are both very good. Vias y mujeres 8a is a relatively new route that has already reached classic status. The car park is large, however this is also the starting point for a very popular walk so all the parking spots can be taken up very early in the day.
A short way further up the road is another south facing crag which enjoys the sun until about 4pm. This is the accessible El Salmon with many routes at more reasonable grades. The photo ticks here are El polivaliente 6b and El retorno de mechas 7a.
Cueva del Ribero, SectorClonicaandCuevadelCorazonarethree popular crags close to the village of La Hermida. Rebelion en la granja 7a, Chucho’s Wall 7b and Estira la Parra 7b+ all standout. The recently developed CuevaHermida, a pleasant 20m walk from the village centre, is crammed full of steep powerful routes for the strongest climbers. There are also many smaller quieter venues worth checking out as you progress up the gorge. Parelosa is shady with good routes in the high 7’s that would benefit from more traffic. One of the best routes is Relatividad 7c+ however the photo tick is La coquilla asesina 8a which is a 15m extension of Perirrojo 7b. Dolce Galbana 8a+ is a spectacular 26m route, with three distinct cruxes, that is rapidly becoming a power endurance classic.
Valle de Bajes is a side valley rising out from La Hermida towards the village of Bajes, which is a popular starting point for walks up into the Picos de Europa and is also well known for it’s speciality cheeses. The Bajes valley also contains a few accessible crags which are ideal for novices. The quick drying crag Calabreru is more difficult to access and the belays are off narrow ledges. The wall is gently overhanging, the routes are hard and up to 40m long. The photo tick here is Eowyn 7c+.
Cicera is 15 minutes pleasant stroll followed by 5-10 minutes steeply uphill. This north facing venue provides plenty of shade and it’s needed because the route are hard. Lots of 7’s and 8’s to try up here. Pacifis 7b+ and Mancha roja 7c are both hard but remain justifiably popular. Deambulante was overgraded at 8a but the climbing is good so it should remain popular as a hard 7c+. The excellent Troncomovil 8a has a tricky diedre to negotiate then an endurance fight to the top. If you prefer tufa endurance then Veneno azul 8a is considered a classic. Walking on the Moon 8a+ is a hard and technical test piece, the superb Arte si quieres 8a+ is also worth checking out. For 40m of pure resistance try Entropia and Treinta anos de locura 8b, both are superb. At a more reasonable grade La Corbata de Unquera 7a is well worth doing but possibly not the best choice for a warm-up. Steep and intense at the start, then technical face climbing higher up. The next route right Naturaleza Viva 7a+ is also a popular route on some curious iron intrusions.
If that’s all a bit too easy, on the opposite side of the gorge you will find Carcalosa. An aerobic 45 minutes of scrambling steeply up, occasionally pulling on ropes, leads to the huge cave with routes up to 9a and harder projects. The right side is a bit more amenable with the classic Dimensiones paralelas 7c+ tackling the twin tufa system.
There are some more smaller river side sectors to check out as you travel further up the gorge including Placasde Esquilleu. This has a slab that is very popular with novices. Nearby is El Lado Oscuro (The Dark Side) and if you are willing to wade the river you will be rewarded with some long routes at 7c and three at 8’s. The excellent Museo Coconut 7c and Gretaline 8a+ are both over 30m long.
Cabanes comprises of six sectors with a good spread of grades that all overlook the stunning alpine meadows and enjoying spectacular views of the Picosde Europa.
The ancient town of Potes offers shops, cafes and restaurants making it an interesting day destination. La Reunion Bar in Potes is a great spot with good beer, music and wifi along with climbing info & topos. Posada La Cuadrona at La Hermida also has wifi and topos for some of the more secretive sectors.
Beyond Potes is the small sunny sector of Los Zaborros de los Llanos which is unusual in that it has steep easy routes, Vs and 6s, ideal for novices wanting to progress from slab climbing. Finally don’t miss the dozen or so gently overhanging pump fests ranging from 6b to 7b at the south facing Cosgaya up near the head of the valley.
Rest Day Activities
A superb way to relax on a rest day and recover from the powerful wrestling with the many steep tufa climbs in the area, is to enjoy the freely accessible hot springs situated underneath the bridge that leads to the Balneario Spa Hotel. There is no signage so it is very easy to miss despite being adjacent to the main road. Other activities could include hillwalking in the stunning mountains of the Picos de Europa, Via Ferrata, bike rides or the telepherique from Fuente De. Alternatively perhaps a trip out to the coast to surf or just sit on the beach.
Accommodation
There are ample places for climbers to sleep rough in a van. Camping la Viorna is a popular campsite near Potes, while there is almost too much choice if you prefer to be closer to the coast.
In early 2005 I was invited by Andy Earl on a trip to go bouldering on the superb granite blocs of Cresciano and Crironico in the Ticino area in Switzerland. I’d gone along with a serious knee injury and although my main role was as a photographer I couldn’t resist packing my climbing shoes.
Everyone climbed as a team, they took on a lot of serious highball problems that required a lot of mats and attentive spotters. Generally the rule was once one person got up the problem then everyone moved on. Most of the climbs attempted received successful ascents but not necessarily by the person in my photos. There was some terrific banter and looking back it was a privilege to be part of amazing trip to be a part of.
The strong British team of Andy Earl, Gaz Parry, Ian Vickers, Percy Bishton and the young Jamie Cassidy (Taz) was given an international flavour when we were joined for the week by Wouter Jongeneelen and Dennis Teijsse two of the strongest climbers from the Netherlands at that time, (oh and myself and my cameras).
Flicking through Gaz’s guidebook was impressive with whole sections already ticked. On previous trips Gaz was more interested in mileage but this time he sought to fill the gaps and he managed this with great efficiency. The highlight of the trip for Gaz was probably success on the very powerful ExtremeIroning. For the rest of the team however it was his effeminate victory scream as Gaz topped out on another eight, La Pelle.
Considering that Andy Earl’s trip was marred by a bad cold he still managed to pull off some astoundingly quick ascents of many of the hardest problems in the area mixed with a few spicy highballs that had his spotters unsure whether to spot Andy or protect themselves as he plummeted ground wards prior to his eventual success on Stinky Pete’s a mere Font 7B!
Andy, Gaz and Wouter all managed to make short work of the standing start to the infamous Dreamtime (8A+) for Wouter success came on his last attempt of his last problem for the week.
Ian spent this trip taping his tattered tips and quietly clearing up many outstanding problems that had eluded him on previous visits. Butch spent a long time looking for the right problem to get his 8A tick in for the trip, steeper the better. After an awesome flash of Soucoupe LH (7C+) he found just the thing on the last day at Crironico, a powerful sequence across a huge horizontal roof overlooking the valley.
The grades in the Cresciano Area have a reputation for being soft but that’s not how I found it, variable certainly. Some of the warmups in the sixes appeared to be just as challenging as the many more famous grade eight problems that succumbed to the team like La Boule, Franks Wild Years, Kirk Windtain and The Jungle.
After a fitful night’s sleep, I woke trying desperately to keep out the cold. Moving to get up I noticed a white frost on my sleeping bag. Then, that the condensation on the inner tent was frozen. Fearing the worst, I opened the flysheet, which was nearly white inside and out, and removed the top from my water container. The bottom stayed on the ground thus spilling a few drops of water on to my sweaty socks. When I picked them up, they too were frozen. Worse still, my boots were frozen stiff. This could have meant the end of the trip but fortunately only three tarmac miles remained to Fort William (fondly known as Fort Bill) and the salt waters of Loch Linnhe on the West Coast.
The idea of a coast-to-coast walk came about long before the “Ultimate Challenge” was conceived. A walk across Scotland seemed like ‘a good idea’. I struggled to decide between walking from East-West or West-East. I finally decided to get the day walking on tarmac over at the beginning and leave the opportunity of catching a train home at one the many stations on the West Coast. Originally, I intended to try to carry less than a week’s food at a time, but this did not work out. Some food was left in a tin under a bridge near Dalwhinnie and more fresh food was bought at Braemar and Dalwhinnie; the rest was carried from the start which made the first couple of days a chore. The train journey from home to Montrose seemed to help me acclimatize to the change over the next fortnight, of which I wrote in my diary “I am going to enjoy every day… after tomorrow”. People on trains are intriguing; groups of rowdy people, couples getting close, solitary shifty-eyed people and then there are the kids – the entertainers.
After a reasonable Bed and Breakfast for £5 at “Bonavista” in Montrose, I left and headed down to the beach in a slight drizzle. That’s the way it stayed until about three thirty in the afternoon. I took two self-portraits on Montrose beach and then set off for Fort Bill. My planning included a scenic route for Glen Esk, but I wasn’t rewarded with the expected views of the basin. The walking was tougher than I had envisaged, I only managed seventeen miles and was glad to stop when I did. I also began to doubt whether I could make it to Glen Doll Youth Hostel by the following evening as planned. However, I had to telephone home Monday morning as arranged, mainly for Mam’s peace of mind. I tried to eat as much as possible that first evening to ease my burden for the following day.
What a day! I tried to get to Glen Effock for lunch but stopped short at Dalbrack Bridge. The push up to Cairn Caidlock had me doubting whether I would make the Youth Hostel. I stopped once, twice, and again for a photograph of Glen Esk; then shattered, sat down at the top. I followed the track towards Burnt Hill and when I left it at the bealach, my troubles began. I stopped many times, tired of the terrain, the weight of my sack and the distances left to go. It wasn’t until I neared White Hill that my hopes began to rise, my throbbing thighs eased, and I could see Green Hill. A couple more stops down by Loch Brandy, where I was excited to see many white hares, and I was in the Ogilvy Arms for a pint and a toastie. By now, I was willing to accept a lift, but the last four tarmac miles were walked in one hour ten minutes. I tried to buy a bottle of milk from a party in Acharn but instead they just gave me one free. Then I booked into the familiar Glen Doll Youth Hostel for food and a welcome bed, tired, but pleased after twenty-five miles to be on schedule.
Glen Doll Youth Hostel
Murderous Miles(Monday 13th April 1981)
I could afford a late start from Glen Doll after yesterday’s efforts, so left the Youth Hostel at 9.45 a.m. Taking Jocks Road, I made for Tolmount. After putting my damp tent out to dry, I ate lunch, then climbed Tolmount, sackless. It was a scorching hot day with just a slight welcome breeze in exposed places. The views were terrific, back over Glen Clova and Glen Esk, and my way ahead over Ben Avon and the Cairngorms. I continued on my way at 1pm and arrived at Loch Callater Lodge at 4pm. It then took a murderous one and a quarter hour to cover the same map miles to the road. Again, I was willing to accept a lift but no-one stopped. Braemar Youth Hostel was quite full with a noisy school party so they gave me a family dormitory all to myself. I saw my second ever lizard during the day and I was to see many more before Fort Bill.
Before leaving Braemar I stocked up my supplies, posted two used maps and four post cards. Approximately one mile west of the village I managed to cross an icy cold river Dee, reasonably easily since there had been no rain for two days. In fact, I had more trouble crossing the drainage ditches. A good track took me to the bealach between Carn Elrig Nor and Carn na Criche where I stopped for lunch in the shade of a boulder. Then I stumbled along various sheep and deer tracks down towards Quoich Water and took a photograph as an excuse for another stop in the shade. I came across a tent, then a nearby path so I made better time for about five minutes until I lost the path by turning left too soon. Realising my mistake, I cut up hill to find a good stalkers track and took even more photographs from this point just as excuses for a rest, before crossing Quoich Water to stumble wearily up the slopes to a frozen Dubh Lochan. The ten and a half miles from Braemar took a lot of time and effort. On reflection, I feel I must have suffered slight sunstroke because when I put up my tent all I wanted to do was to get in the shade. I forced myself out later to take some photos of this fantastic “high altitude” camp site.
Since my watch stopped last night I guessed the time was eight o’clock, actually I discovered later, it was only 6.30am! I looked outside the tent and saw a cool clear cloudless sky. I was in no rush, so after an ambling breakfast of fresh food, I struck camp. It was up hill straight away so I aimed for the shade and took a short rest before returning to the sun-kissed ridge. I left my sack on the summit ridge and wandered along to Beinn a’ Bhuird’s south summit. It was about this time that I began to notice the magnificent views as far as the eye could see; Glas Moel, Tolmount, Coire Etchachan, Beinn MacDuibh, Cairngorm and many more that I couldn’t name. With raised spirit, I walked to the North Top and took some panoramic photographs. I set off for Beinn a’ Chaorainn Bheag and when the sun was due south I set my watch to twelve o’clock. A short chat with some lunching walkers set me in high spirits again to spurt up Beinn a’Chaorainn. I ate an apple to reduce weight for the descent into Larig an Laoigh. Then, following the path south for a while before crossing to the Coire Etchachan path, I noticed a party of twenty walkers! I hoped they wouldn’t stop for the night and disturb the solitude. They sat around for ages before deciding to carry on to Ben Macdui, relieved, I settled down for the evening.
By eight thirty I was on my way up to Ben Macdui where I spotted some Snow Bunting. I tried to photograph them, but they flew off. I made good time only stopping for some quick photographs and reached the summit by 10:15 am where I was greeted with fantastic panoramic views. Another fantastic photo session followed. Eventually I left the summit ridge by March Burn. After half an hour’s steep scramble, slide, fall, down to the Pools of Dee, I managed to pick out a line of weakness so avoiding snow up to Sron na Lairige. I got almost to the top so stopped and ate lunch, all within an hour. I finally made Braeriach at two fifteen and stopped for more photographs and a chat with a party that had just taken five hours to get here from Glen Feshie. It took me four and a quarter hours to get down. My biggest worry going over the plateau was the sun on my legs. It was far too hot for my warm trousers so I wrapped my Kagole over my shorts to try and protect my legs from burning.
I was woken in Glen Feshie Bothy by my motorcycling friends at six in the morning. A little worried about all my gear I rose at half past six but they left just then without any bother and even set the fire after them. I took time to wash, change the film in the camera then swept up. A paddle across River Feshie took me directly to the stalkers path up by Lochan an t-Sluic. Once through a forest, the path became indistinct. Frustratingly, this was right on the join of two maps. Whilst carefully examining the maps I’m sure I spotted a Golden Eagle. The day was so calm that he struggled to find an updraught to soar on. I wandered along various tracks going in my direction until I stumbled upon a road which wasn’t marked on my first series OS map. It led to a weir which fed all the water through a tunnel to Loch an t-Seilich, which is a hydro dam. During lunch I thought how good it would be to work here, especially if paid, and even in the rain. A Swiss registered Citroen passed me with Gaick Lodge Ranger written on it. The path unfortunately took me through the grounds of the lodge, where the Swiss were sitting in the sun. A few polite words and I was allowed through the grounds to the foot of Sgor Dearg where I dozed for twenty-five minutes in the heat of the day. An indistinct path took me around the lip of Coire Chaich and a Land Rover track led down to Loch Cuaich.
Low Cloud over Dalwhinnie (Saturday 18th April 1981)
Early next morning there was quite some cloud on the hillsides above me and over Dalwhinnie below. It was a pleasant cool change from the last seven days of unrelenting sunshine. After a later start than intended, I set off by Allt Cuaich. Suddenly a dam diverted the water to feed Loch Ericht via an aqueduct. I uncovered the box of food which I had hidden a month earlier. I was pleasantly surprised to find more food in the box than I remembered leaving. Hurriedly I packed hoping to catch the solitary Dalwhinnie shop before it closed for Easter. With three quarters of an hour to spare, I bought more fresh food. After posting more maps home, I made some phone calls, my last contact with home before Fort Bill. I then made my way along the shore of Loch Ericht where I stopped for lunch. Reading the Daily Express as I walked to Ben Alder Lodge along a good Land Rover track. Just behind the lodge there was a herd of almost tame deer. I tried to get a good stag pose but could only see their tails. However, a pair of white horses insisted that I took their photographs. The last two miles were hard work and when I looked in the bothy, I saw thirteen people. Apparently, they were London Bankers on an Outdoor Course. Why can’t these groups carry tents? I pitched my tent at a short distance away from the Bothy. I enjoyed walking today.
The cloud base was around 900m, covering all the tops surrounding Cuhra Lodge, so I lazed through breakfast wondering what to do for the best. Eventually I decided to leave the tent up and stay here another night. So with just a camera over my shoulder I set out for a lightweight ascent of Ben Alder. At Bealach Beithe I sat and ate salted peanuts, watching clouds for encouragement. I ambled across to the buttress when clouds rolled up the ridge, so I hurried upwards. The clouds lay on the summit as a freezing mist. Wandering over to the summit I stopped for another self-portrait then after a quick bite to eat, I moved on. Just as I left the summit the clouds lifted revealing excellent views and I ran over to photograph The Ben before it closed in again. I need not have worried as it stayed clear for the rest of the day. It was “photos galore” all the way down to Bealach Brebag and lunch. A heavily laden walker passed by so after following him to the first top, we stopped for a chat. Then it was on to Beinn Bheoil for another photographic session. On the track back I met someone called Bob, he was the only one left in the bothy so I took down my tent and joined him. Although we were strangers to each other, we were soon exchanging tales like two old pals.
I was concerned that I only had enough fuel for approximately two days so Bob made a brew for both of us. I left the bothy at 8.30am on another beautiful day. Inspired by the weather I decided to follow the ridge from Carn Dearg via Geal-Chairn and Aonach Beag to Beinn Eibhinn, which provided incredible views further west of Blackmount, Glencoe and Lochaber. Then from Beinn Eibhinn down to the footbridge seemed to take ages i.e. from twelve fifteen to two o’clock to be exact. I saw my fourth lizard basking in the sun when on my way down to lunch under the bridge. As I was enjoying the shade of the bridge I washed in the cool waters. Refreshed, I set off towards Ossian Youth Hostel. It was really hot work along the beautiful rhododendron lined track by Loch Ossian. There were people in the distance beside the Youth Hostel so I walked up to them hoping to cadge an overnight stay but I was just told that it did not open until 15th May. Disappointed, I sat down and ate a couple of biscuits. When no offer of accommodation or even a cuppa was apparent, I set off for Larig Leacach. The walking was pretty mechanical along good paths and tracks. I expected to camp by Creag Uaineach Lodge but I couldn’t get near enough to flowing water so I carried on up Larog Leacach to find a good site. At 6:20pm I wrote in my log:- “I could have possibly made it to the bothy but my feet are quite sore after a long day. I hope to make an early start in the morning and all being well it’s The Ben tomorrow”.
What a day of ups and downs in more ways than one. First up at 6:15am, first down was around 6:30am when my watch still said 6:15am! I had struck camp by 8:15am but didn’t make the bothy until 9:40am. I ate a packed lunch whilst sitting not wanting to go on. I felt that it was too late. However, fearing a change in the weather I set off at 10am. It was hard work up to Stob Coire na Ceannian but I made good time stopping only once. A good ridge took me up to Stob Choire Claurigh where I tried to photograph a snow bunting. I left there at 11:20am on a good ridge to Stob Coire Easain, then I sat down at the next bealach. It was getting very hot and the next climb looked steep. It was 2pm and another packed lunch eaten before I moved on up Sgurr Choinnich Mor. A grass slope led down and up again to Sgurr Choinnich Beag. From here the climb to Aonach Beag appeared too much so I gave up and sat in the sun.
I wandered down to the Bealach to look for a camp site and found one under Sgurr a’ Bhuic. I thought that I should have kept going but I felt so drained and did not have the will to keep going. Noticing some Nimbus Cumulus, I thought to myself “is that rain tomorrow?”.
In my log I wrote “Well, I’m certainly glad I stopped yesterday. The time it took me today would have meant arriving at Loohan Meall an t-Suidhe at approximately 10.30pm.”
The wind got up to give me a noisy night in my lightweight tent. I woke to find that the condensation on my flysheet was frozen. Cups of lemsip and tea, some muesli and three scrambled eggs set me on my way. I left at 8am with my duvet on and under the threat of snow or rain. Still unsure of the way, I returned to the path following the fence posts. They went slightly left then up to an arete, but I soon left it to traverse to the ridge running down to Sgurr a’Bhuic. From here it was more straight forward. I took off my duvet but before I reached the summit of Aonach Beag I had it back on again and thus it stayed until I descended off The Ben. The way to Carn Mor Dearg was marked with a cairn on the slope of Aonach Mor. I think I must have gone wrong somewhere because going down was a bit ‘hairy’ at times, dropping all the way down to the col at 830m. The path climbing 400m straight back up to Carn Mor Dearg was a little indistinct at first but it soon became an impressive knife edged ridge. On this summit I saw yet another snow bunting. An enjoyable ridge dropped down to a cairn marking a possible descent into Coire Leis. Then it became more and more broken boulders up to the Ben. It was a slow haul up but stepping over the lip, there was the summit mess in all its glory. The views from the summit weren’t too bad, the Glencoe hills and Knoydart but not much more. It was 1:50pm so I ate my lunch before climbing Carn Dearg, (mainly to avoid the tourist track). Then it was downhill all the way to Lochan Meall an t‘Suidhe and beyond to Glen Nevis where I camped. By now I had very little paraffin left so I bought tins of stew, rice pudding and fruit. It cost me a pound for the privilege of camping but I thoroughly enjoyed a twenty pence shower, my first since Braemar. I lay down exhausted at 9pm fortunately in my sleeping bag and snap – I was out like a light.
The three tarmac miles to Fort Bill and the salt waters of Loch Linnhe were a non-event, but I completed 173 miles of walking and 9376 metres of climbing, over 13 days and although it snowed a little just once it never rained after the first day.
I clearly remember that weekend in 1987, we had quite an epic adventure on Ben Nevis. Bob Bennett had written the Lake District Winter Climbs Guide and climbed all the important winter climbs in the Lake District adding many new routes there too but he still hadn’t had an opportunity to climb the super classic Point Five Gully V,5 up on Ben Nevis.
We set off up the hill on a perfect day. Bob was so psyched to finally be getting to grips with Point Five, he allocated the pitches so that he got the plum pitch! I happily set off up the first pitch of the historic Point Five Gully, expecting an easy ride, suddenly as I climbed up I got smashed in the face by a small but painful lump of ice, it was a warning to keep my head down! I set up a good sheltered stance off to the side and out of the line of fie! Soon I would be seconding Bob on the infamous second pitch.
Bob followed me and was soon making smooth work of the second pitch, conditions were excellent. Just as some spindrift rushed down the pitch I thought I could hear Bob calling down “climb when you’re ready”.
I waited safely to one side for the spindrift to ease but it continued to get worse. After quite a while I thought to myself time is pressing so I’d better set off now and it should soon ease and anyway I am on top rope. I called “climbing” and traversed out and into the spindrift. Keeping my head well down I climbed quickly with the confidence of the rope above me and in a blur was soon stood below pitch three and finally the spindrift had stopped. “Well done Steve” Bob shouted across “You may as well continue , there’s no need to come over here.” With no more incident the angle eased and we were soon up on the summit.
Another party were just leaving the summit as we sat down all self congratulatory for a quick snack. Visiability was difficult in near whiteout conditions so I dug out my crib sheet for navigating off the top. Meanwhile another party arrived at the top. But no!, it was the same party that had just left and walked around in a big loop only to end up back at the summit cairn all confused! We all set off together this time I was navigating down, counting paces… Soon there was more voices appearing out of the mist “Are you heading down? do you know where the top of the descent gully is? came we join you?” So there I was leading a dozen folks down off the hill. One party left us to descend back down the north face towards the hut while the day trippers followed me down out out of the clouds and safely back towards the cars. While walking down Bob commented on how fast I had climbed the crux pitch and how difficult it had been to take in the iced up rope through his belay plate. It was one summer’s evening six months later in a bar in the Lake District that Bob finally admitted that while I climbed the second pitch, head down, he was taking in the ropes had over hand and when I topped the second pitch he didn’t want me to see what happened which is why he pressed me to continue quickly up the third pitch while he sorted out the ropes behind my back as I continued upwards!